The Composition of a Flexible Tank
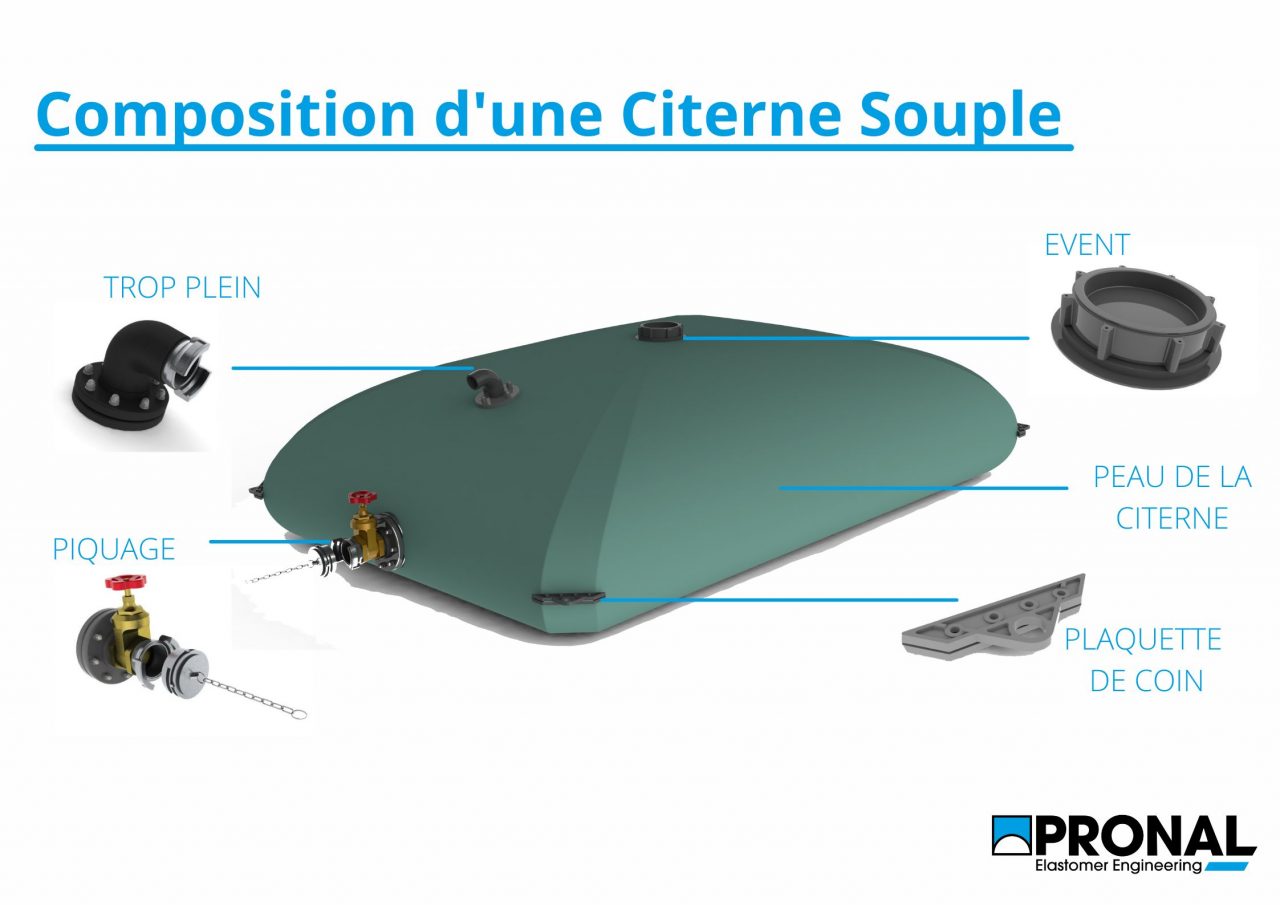
The flexible tank is made of highly resistant PVC coated fabric (1300 gr/m2) and assembled by high frequency welding. This fabric is resistant to any temperature from -30°C to +70°C. It can temporarily or permanently store different types of liquids.
In addition to this “skin”, accessories are added:
- 4 corner plates that serve to reinforce the corners of the tank.
- An overflow: when the tank reaches its maximum storage capacity, the liquid will be evacuated through the overflow.
- A vent: to evacuate the air trapped in the tank when filling it to prevent it from losing its storage capacity
- A spigot: to fill and/or empty the tank
Precautions for use
Several rules must be known and respected in order to avoid damaging the tank.
- The flexible tank must not be in contact with sharp surfaces or ones likely to damage it. We recommend that you place a floor mat, a geotextile or a liner under the product.
- You should never store more liquid than the rated capacity of the tank. Indeed, each tank is made according to the liquid you wish to store inside.
- You must not fill the tank with any other liquid than the one for which it was designed (please contact us)
- Never walk on the tank – only an authorized person is allowed to do so
- During periods of frost, you must isolate the valves
- It is important to never leave the tank empty when it is deployed, as this could cause it to fly away and deteriorate.
- It is forbidden to handle the filled tank, as well as to carry it by dragging it on the ground.
Now, you must prepare the ground to install the tank properly.
The ground you have chosen must be horizontal or have a slope of less than 1%. Moreover, it must be free of any protruding part that could damage the tank’s skin.
If you do not have a wide range of options for the ground and it is uneven, we strongly advise you to level the ground with sand or earth to reduce unevenness. In addition, the use of a floor mat is recommended.
Installation of the flexible tank
First, roll out the floor mat (if you have decided to use one).
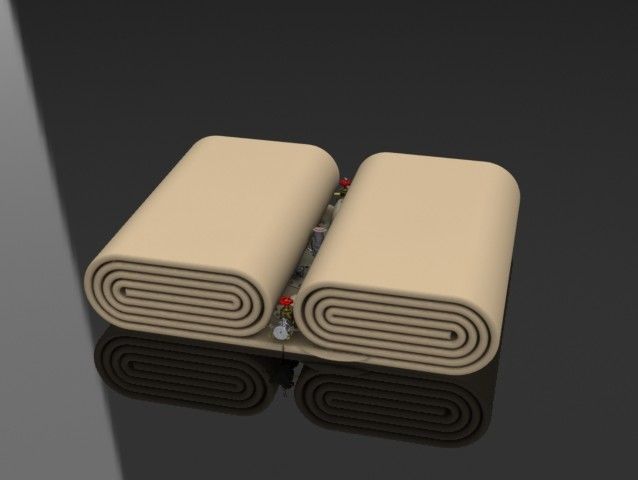
Take the tank out of its box/cover, and place it rolled up,
- about 2 meters from the edge: for small capacities rolled into 1 snail
- or in the middle, for larger capacities, rolled in 2 snails
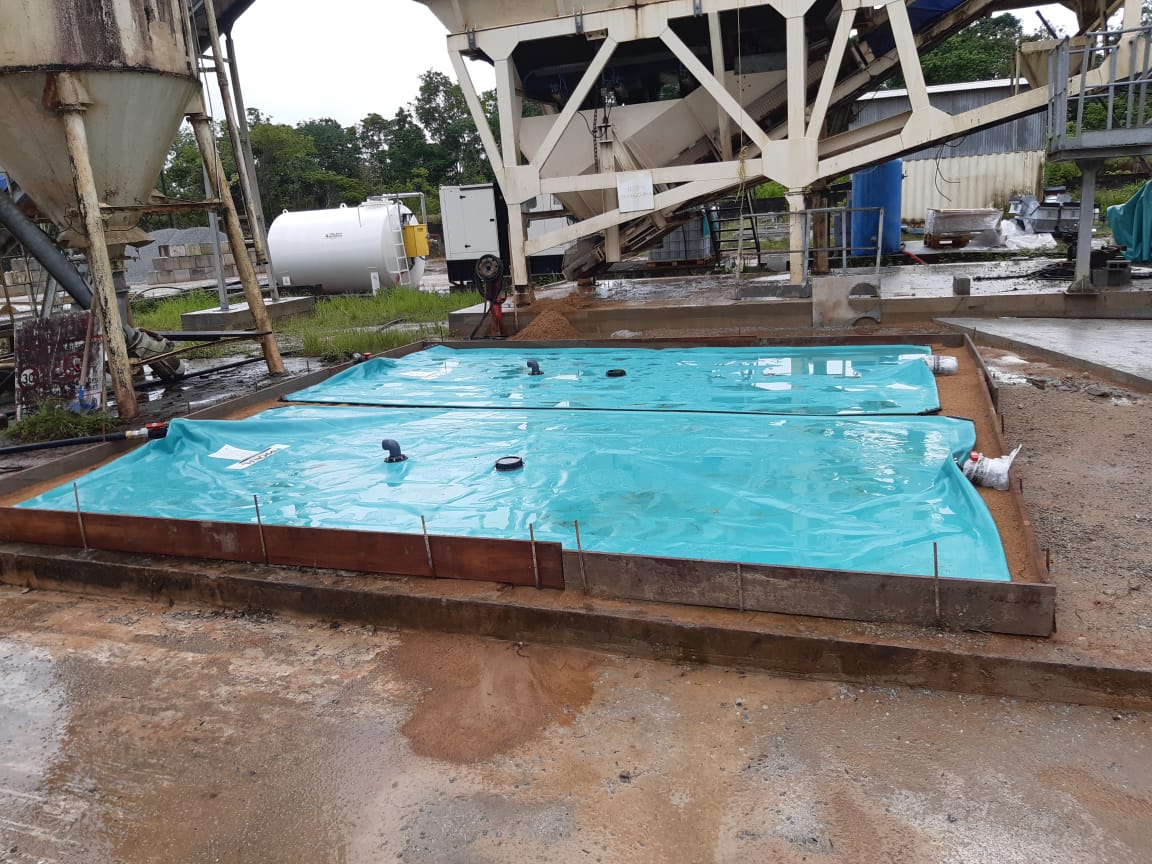
You can now unroll the entire tank first lengthwise and then widthwise.
Stretch the skin as much as possible to eliminate wrinkles by forming an air mat under the tank.
Depending on the capacity and size of the tank, not all accessories are factory fitted. In fact, in order to preserve the integrity of the tank during transport, some accessories will have to be assembled after the deployment of the tank.
The use of the flexible tank
Step 1: Filling the tank
Before starting to fill the tank, you must
- check the tightness of the nuts
- remove the cap from the vent
- and make sure the overflow is open
You must use a flexible hose to fill the tank. If you use rigid hoses, you risk damaging the tank. Next, make sure that the hose and valve are not under tension and that the hose is long enough (as long as the height of the tank at maximum load).
Now connect the hose to the tank, open the valve and start filling!
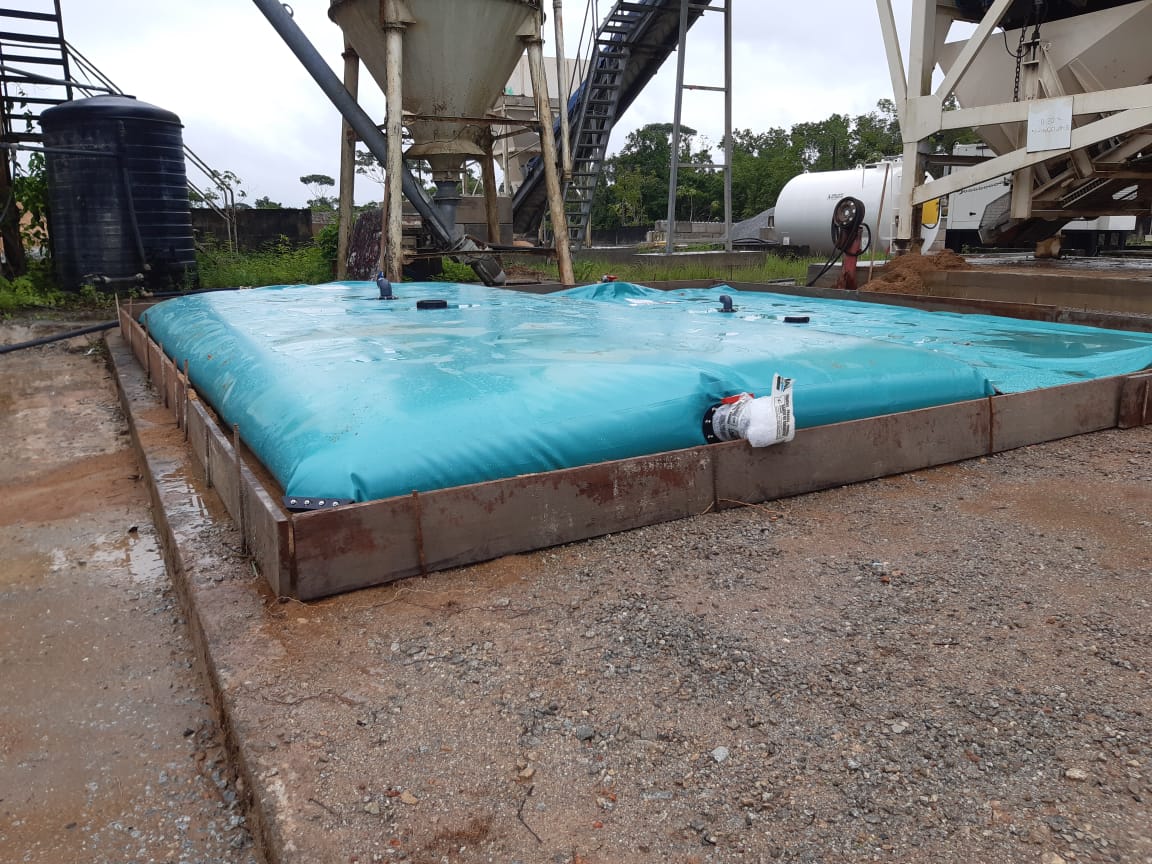
As the tank rises, be careful not to exceed the filling height noted on the tank! Stop filling before the tank overflows by closing the valve and stopping the supply. You can put the cap back on the vent.
Don’t panic: the materials used are never 100% waterproof. It is therefore possible that seepage or stains may appear on the skin or on the welds after the first filling.
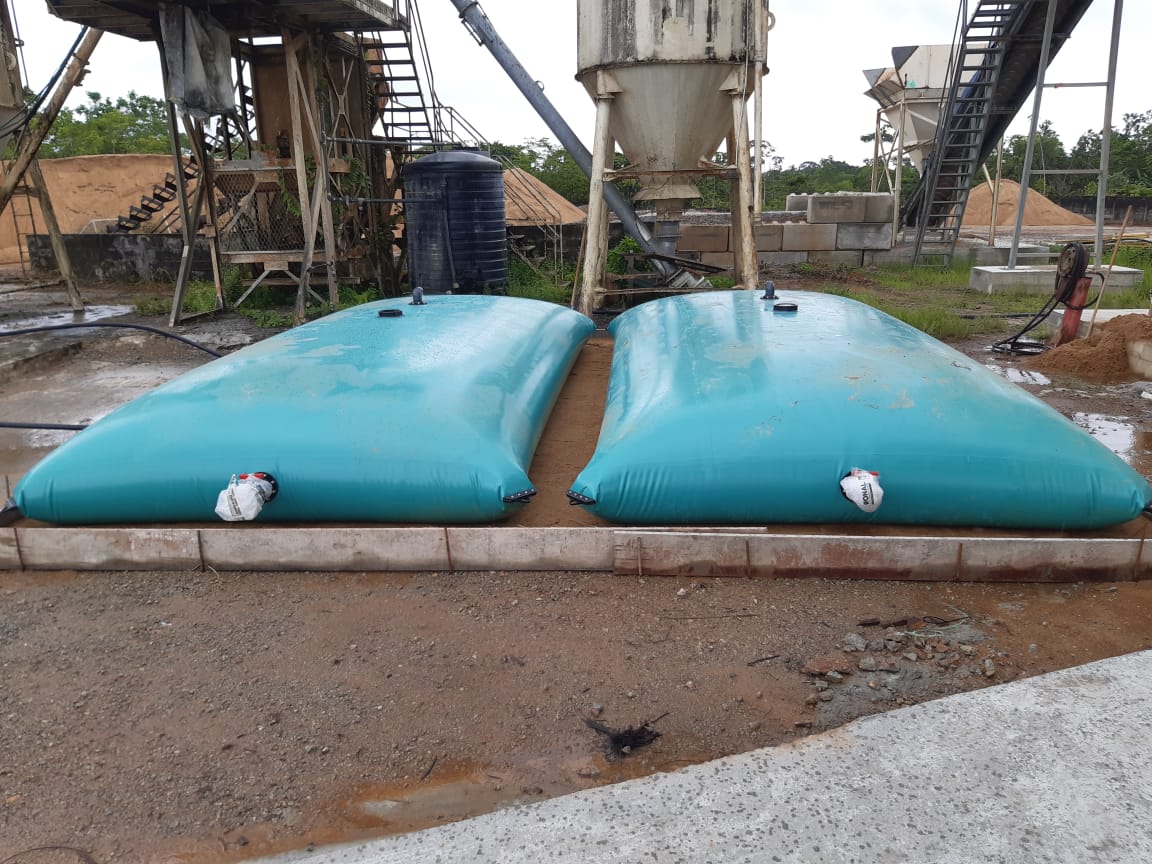
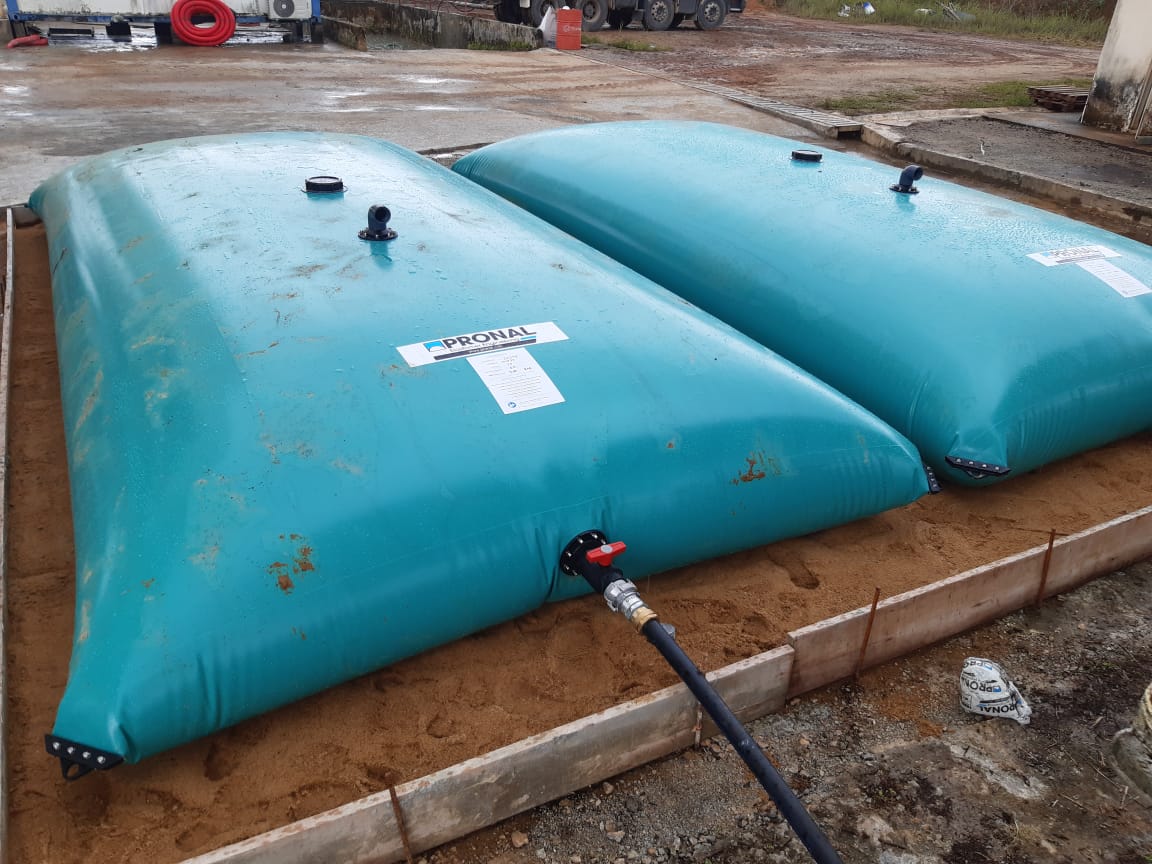
Step 2: Draining
When you no longer need to store the liquid, simply connect the hose to the tank and open the valve. The tank sinks more and more as the liquid flows out.
Step 3: Storing the tank
To properly store a flexible tank without damaging it, you must fold it according to certain instructions:
- First, lay the tank flat,
- Put protective covers on the openings, and protect any protruding parts that could damage the tank’s skin.
- Depending on the size of the tank, fold one side over the center plate, the edge of it.
- Fold the same side over the previous layers.
- Repeat this process until you have a fold with a total width of 50 or 100 mm less than the inside dimension of the packing case.
- Fold the other side of the tank to the limit of the first fold
- Then continue folding the layers on top of each other without exceeding the folding width.
- Finally, roll the tank from the side opposite the fold.
- You can then strap the tank if you wish.
Here you go! You have all the elements to install, use and store a flexible tank! A video is in preparation 🙂
Discover also how to install an inflatable trench shield or an inflatable manhole cover!